It’s 4:30 p.m., the snacks are gone, and your kid is restless. You search art activities for kids printable, open five tabs, and still feel stuck—sound familiar? You want something simple, fast, and actually fun.
The real snag isn’t ideas; it’s the messy gap between cute pins and real life. Projects need fancy supplies, take too long, or end in tears (yours or theirs). That chaos costs time, money, and the tiny window when kids are curious and calm.
Here’s the thing: by the end, you’ll have age‑sorted projects, everyday materials that work, and a printable supply checklist ready to go. You’ll know exactly which art activities for kids printable to use for toddlers, preschoolers, and elementary kids—plus how each builds skills. Ready to set up creativity that actually sticks?
How Art Develops Fine Motor Skills And Creativity
Crayons look simple, but they’re stealth strength trainers for tiny hands. Why does a single stroke matter so much? It builds pinch strength, wrist stability, and the tripod grasp that later powers handwriting, scissor use, and self-care tasks.
Here’s the thing: art is a two-for-one—fine motor skill plus creativity. When kids squeeze clay, thread beads, or snip shapes, they practice graded pressure and bilateral coordination. At the same time, open-ended choices light up divergent thinking, visual–spatial reasoning, and cognitive flexibility. Those are pillars of executive function, highlighted by Harvard’s Center on the Developing Child.
💡 Pro Tip: Swap chunky markers for short crayons or golf pencils; the American Academy of Pediatrics notes shorter tools naturally cue a tripod grip and reduce fatigue during early writing and drawing.
| Activity | Fine Motor Target | Creativity Payoff |
|---|---|---|
| Lacing Cards / Bead Stringing | Pincer grasp, bilateral coordination | Pattern design and color planning |
| Clay Pinch Pots | Intrinsic hand strength, palmar arches | 3D form exploration and iteration |
| Q‑Tip Dot Painting | Precision, graded pressure | Pointillism play, patience building |
| Collage With Child‑Safe Scissors | Scissor control, hand–eye coordination | Composition and mixed‑media ideas |
In practice: picture this scenario—your 4‑year‑old presses tiny beads onto a lace. At first, fists clench and beads spill. After two weeks, thumb and index do the work, wrists stay neutral, and patterns emerge. That’s measurable progress toward school readiness and better self-regulation through task focus. If you’re worried about delays, check with your pediatrician or a licensed occupational therapist for personalized guidance.
- Clean, controlled snips on thin paper without turning the whole body.
- Beads moved by thumb and index—less “whole‑hand” grabbing.
- Wrist stays steady while coloring; movement comes from fingers.
- Grip pressure looks calmer; lines get smoother and more intentional.
And honestly? What actually works might surprise you—most parents overlook one tiny setup tweak that unlocks faster gains…
Set Up A Home Art Station With Everyday Materials
Tired of craft chaos at 4 p.m.? A simple, kid-height art station turns “I’m bored” into calm focus—without fancy carts or boutique supplies.
Why does layout matter? Visibility and reach shape choices; when materials are clear, safe, and limited, kids start faster and clean up better. NAEYC encourages accessible, open-ended tools, and the AAP recommends non-toxic, ASTM D-4236–labeled supplies for safety.
💡 Pro Tip: Use clear bins with one category each (crayons, collage bits, clay tools) and rotate 6–8 items every 10–14 days to keep novelty high and mess low.
| Storage Option | Best For | Trade‑Off |
|---|---|---|
| Portable Caddy | Daily essentials on the table | Can get crowded without dividers |
| Clear Shoe Box | Category storage and rotation | Lids slow access for younger kids |
| Zip Pouches + File Box | Paper scraps, stickers, stencils | Less visual; needs labels |
In practice: picture this scenario—your 5‑year‑old grabs a low caddy with short crayons, a glue stick, and washi tape. Ten minutes later, there’s a finished card and zero floor glitter. The setup, not willpower, did the heavy lifting.
What You Need
- 1 low shelf or sturdy tray
- 2–3 clear bins with lids
- Portable caddy with dividers
- Short crayons, golf pencils, washable markers
- Glue stick, child‑safe scissors
- Scrap collage bits in a sealed pouch
- Microfiber cloth and placemat for quick cleanup
Step‑By‑Step Setup
Setup time: 45 minutes. Budget: $20–$40. Prereq: a wipeable surface and good light.
- Pick the spot at kid height—near the kitchen table or a quiet corner with a lamp.
- Sort materials into single-purpose bins; label with pictures for pre-readers.
- Build a “daily caddy” (coloring, cutting, sticking) and stash extras out of sight.
- Create a rotation box: 6–8 items only, refreshed every two weeks.
- Set a placemat as a visual work zone; add a cloth for fast wipe-downs.
- Post two rules in kid language: “One bin at a time” and “Caddy goes back.”
And this is exactly where most people make the most common mistake—one oversized bin that mixes everything, killing focus and inviting mess…
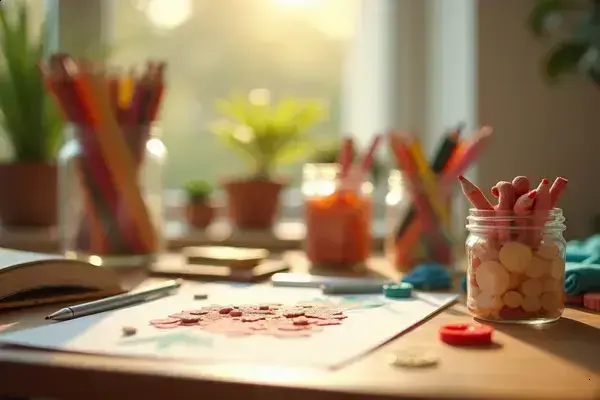
Toddler Projects (Ages 1–3): Safe, Sensory, Zero-Prep Ideas
Wondering how to keep it safe and mess-contained—without a 20‑minute setup? For toddlers, the win is quick, tactile, and easy to tidy.
Here’s the thing: ages 1–3 learn through the senses. Squish, swipe, tap, and peel build bilateral coordination and early grasp strength, while simple choices spark creativity and language (“sticky,” “smooth,” “dot”). The American Academy of Pediatrics emphasizes close supervision and non‑toxic, washable materials for this stage.
⚠️ Important Warning: Skip small parts under 1.75 inches, tie back cords, and keep tape or contact paper away from mouths. Use ASTM D‑4236–labeled supplies. For allergy concerns, choose taste‑safe options and read labels.
What You’ll Need (2‑Minute Prep)
- Large zip bag + 2 squirts of washable paint (sealed tight)
- Painters tape or washi tape (low tack)
- Washable crayons or short markers
- Contact paper (sticky side up) taped to table
- Cotton swabs and a damp cloth
- Sheet protector with printable shape or line mats
- Sturdy tray or baking sheet to contain mess
In practice: picture this scenario—your 2‑year‑old presses fingers on a sealed paint bag. No spills, big grins, new words (“squish!”). Five minutes later, everything’s clean and you’re both calm.
10‑Minute Toddler Art Session
Time: 10 minutes. Prereq: a wipeable surface and supervision.
- Pick one prompt only (choice overwhelms toddlers).
- Set the tray at child height; place 2–3 colors max.
- Model one motion—press, dot, or peel—then pause.
- Name textures and actions to build vocabulary.
- Let them repeat; resist “fixing” the art.
- End with a quick “help me wipe” ritual for closure.
Zero‑Prep Idea Bank
- Squish Painting Bag: Tape a sealed paint bag to the table; draw lines underneath a printable mat for tracing through the bag.
- Water Brush on Cardboard: A cup of water and a brush—darkens the box, no mess, huge control practice.
- Contact Paper Collage: Stick large foam shapes or fabric scraps; match colors to a printable mat in a sheet protector.
- Dot Trails: Cotton swab “dots” with a tiny bit of paint on a plate; follow bold paths on a printable line sheet.
- Tape Roads: Lay painters tape lines; push chunky cars along, then peel together to build fine motor strength.
What actually works might surprise you—most parents skip one tiny rotation habit that doubles focus and slashes cleanup time…
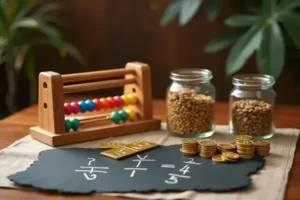
Preschool Projects (Ages 3–5): Colors, Cutting, And Patterns
Preschoolers crave color and control. Give them a smart setup and they’ll cut, sort, and repeat—building real skills while feeling wildly proud of their work.
Why focus on cutting, colors, and patterns now? Scissor control, color naming, and AB patterns strengthen visual discrimination, hand–eye coordination, and early math. The CDC notes many kids 4–5 can cut on lines, while NAEYC encourages open-ended, process-first art to protect creativity.
💡 Pro Tip: Start with 65–80 lb cardstock; thicker paper doesn’t flop, so beginners steer scissors better. Spring‑action child‑safe scissors reduce hand fatigue and help left‑handed kids keep the blades aligned.
Materials You’ll Actually Use
- Child‑safe scissors (blunt tip) + spring‑action training scissors
- Washable markers and jumbo crayons
- Glue stick (non‑toxic), dot stickers
- Premium cardstock (65–80 lb), a few felt pieces
- Printable pattern strips and shape templates
- Short ruler and a small hole punch
Featured Project: Rainbow Cut‑And‑Pattern Garland
Time: 15 minutes. Prereq: a clear table and supervision.
- Place 3–4 printable strips (thick lines) on cardstock and clip them to a tray so they don’t slide.
- Model “open‑close, pause, turn”—slowly cutting along one line before handing over.
- Have your child sort the cut pieces by color; name each shade out loud.
- Create an AB or AAB pattern with pieces; say the pattern as you build it.
- Glue to a longer strip or thread onto yarn using a single hole punch.
- Finish with dot stickers between pieces for spacing awareness (great fine‑motor bonus).
In practice: picture this scenario—your 4‑year‑old starts with wobbly cuts. By the third strip, elbows drop, snips get rhythmic, and the AB pattern clicks. The garland becomes a victory banner—and you’ve just hit math, motor, and pride.
| Pattern Type | How To Teach | Skill Gained |
|---|---|---|
| AB Colors | Say it as you lay: red‑blue‑red‑blue | Sequencing, attention |
| AAB Colors | Group two same, add one different | Working memory, inhibition |
| Shape Lines | Circle‑square repeats on a strip | Category sorting, vocabulary |
| Rainbow Order | Arrange warm to cool hues | Color theory, comparison |
| Cut‑Paste Grids | Match piece to printed box | Spatial planning, accuracy |
And honestly? What actually works might surprise you—most families skip one tiny scissor tweak that unlocks cleaner cuts and fewer mid‑project meltdowns…
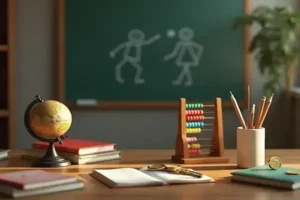
Elementary Projects (Ages 6–10): Maker Challenges And Printable Supply Checklist
Bigger kids love a clear challenge. Give them a design brief and a timer—watch focus spike, frustration drop, and real problem‑solving kick in.
Here’s the thing: maker tasks blend engineering design with art, activating creativity and executive function. Harvard Project Zero highlights iteration as a driver of deeper learning, while NSTA encourages simple tests and measurable criteria to build STEM confidence.
💡 Pro Tip: Use a tight “build–test–tweak” loop: 10 minutes to design, 5 to test, 3 to improve. Constraints sharpen decisions and reduce perfection paralysis.
Maker Challenge: Paper‑And‑Tape Bridge
Goal: span 12 inches and hold 10 coins. Time: 18 minutes total. Criteria: length, load, and aesthetics.
- Cardstock or recycled cardboard strips
- Masking tape (low tack)
- Ruler and measuring tape
- Gold coins or small metal objects (for load)
- Binder clips (optional supports)
- Define the problem—measure a 12‑inch gap using books as supports.
- Brainstorm two designs (beam vs. truss). Sketch quick shapes, not fancy art.
- Build with small tape pieces; reinforce only weak joints.
- Test gradually: 1 coin at a time, then pause to inspect sagging.
- Redesign one element (folded “I‑beam,” triangle braces, or clip anchors).
- Retest, record results, and add a creative finish (marker stripes or a team logo).
In practice: picture this scenario—your 8‑year‑old’s first bridge buckles at three coins. He folds the deck into a corrugated “Z,” adds two triangles, and hits twelve coins with a grin. That data point sticks.
Printable Supply Checklist (Keep In Your Caddy)
Print once, slide into a sheet protector, and mark with a dry‑erase pen each Sunday. Restock before Monday—no more mid‑project stalls.
| Item | Why It Matters | Budget Tip |
|---|---|---|
| Masking Tape | Fast joints, easy edits | Buy contractor rolls; split |
| Cardstock/Cardboard | Rigid beams and gussets | Reuse shipping boxes |
| Craft Sticks | Span strength, trusses | Bulk packs = low per unit |
| Binder Clips | Temporary clamps, anchors | Salvage from old folders |
| Pipe Cleaners | Flexible connectors | Store brands work fine |
| Ruler + Tape Measure | Accurate constraints | One metal, one soft tape |
| Washable Markers | Label, code, decorate | Primary + neutrals only |
| Low‑Temp Glue Gun | Stronger joints (supervised) | Mini sticks save cost |
Once your kit and build–test–tweak rhythm are in place, creativity becomes routine. Small steps, repeated consistently, make the biggest difference over time.
Creativity That Actually Sticks
You’ve got the building blocks: art builds fine motor control and imagination; a kid‑height station with clear bins makes starts and cleanups easy; and age‑sorted projects with a printable supply checklist remove guesswork. With art activities for kids printable, you can move from idea to action in minutes. If you take just one thing from this guide, let it be: design the setup first—behavior follows.
Before, afternoons felt chaotic—too many supplies, not enough focus. Now you’ve got clear prompts, right tools, and tight time boxes. Kids start on their own. Projects finish. Mess stays small. Confidence grows.
Which project will you try first—the squish painting bag, the rainbow cut‑and‑pattern garland, or the paper‑and‑tape bridge? Tell us in the comments!

About the Author: Stephanie Lynn Barrett is a homeschooling mom, educational writer, and the founder of this blog — built for parents who want to give their children the best possible learning experience at home without burning out in the process.
After years of homeschooling her own children, testing every curriculum approach, building and rebuilding daily schedules, and creating hundreds of hands-on activities from scratch, Stephanie realized that most of the resources available online were either too complicated, too expensive, or too generic to be genuinely useful for real families with real kids.
So she started creating her own — practical lesson plan templates, age-appropriate activity ideas, printable routine charts, and honest curriculum guides designed for parents who are figuring it out as they go.
Stephanie is not a certified teacher or child psychologist — just a dedicated homeschooling parent who has spent years in the trenches, learning what works and what doesn’t, and turning every hard-won lesson into content that saves other parents time, stress and second-guessing.
Every article on this site is researched using trusted educational sources including the American Academy of Pediatrics, the American Library Association, the Home School Legal Defense Association, and the American Psychological Association — so you always get guidance that is practical, age-appropriate and grounded in real child development research.
When she’s not writing or planning next week’s lessons, Stephanie is testing new sensory play ideas with her youngest, hunting for the perfect read-aloud for her oldest, and convincing her family that yes, math can actually be fun.